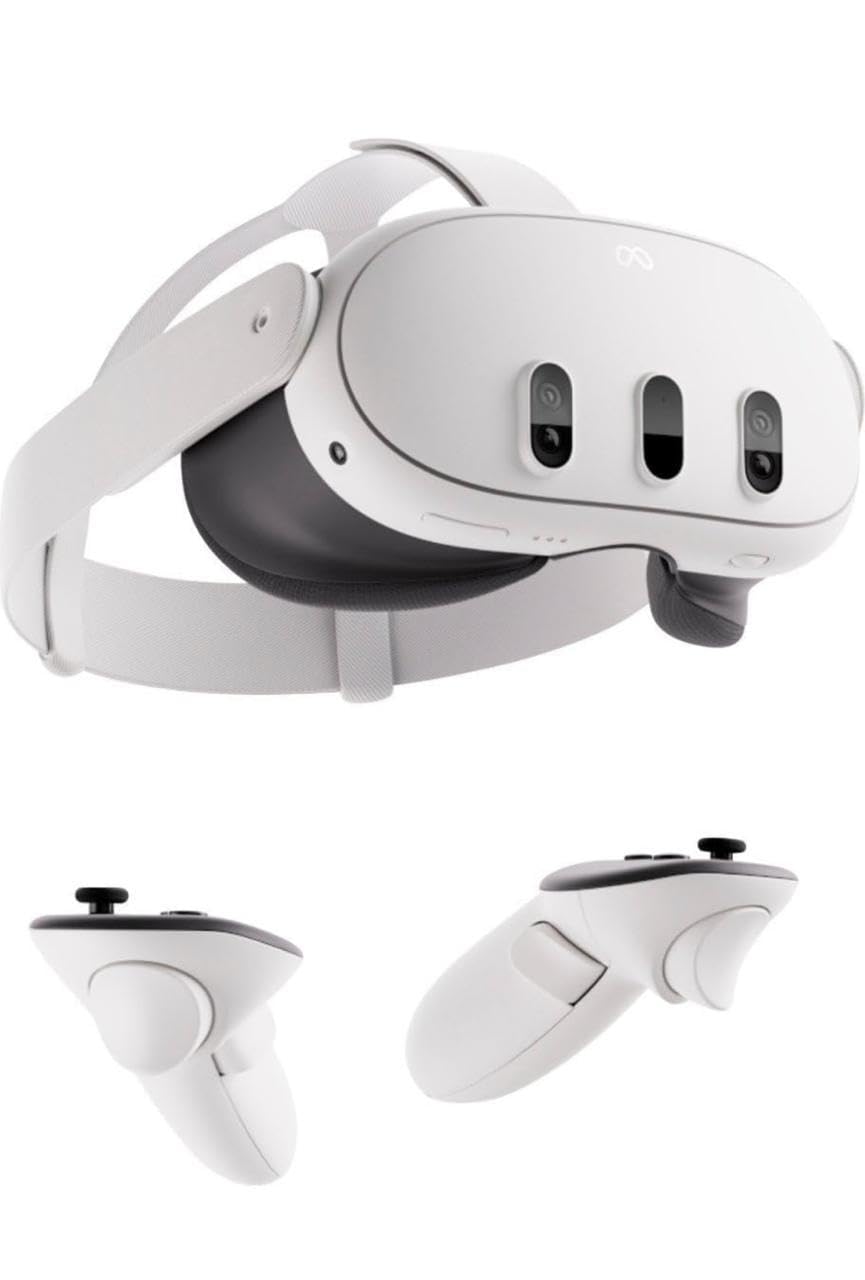
If you’ve recently laid your hands on a brand-new Meta Quest 3 headset, the world of virtual reality is about to unfold before you in ways you’ve never imagined. The excitement of diving into immersive virtual worlds is undoubtedly at its peak.
However, before you embark on your VR journey, we’re here to share a treasure trove of tips and tricks that will elevate your Meta Quest 3 experience to unprecedented heights. Whether you’re a VR novice or a seasoned enthusiast, these insights are designed to enhance your gameplay, streamline your setup, and make your virtual reality adventures as seamless as possible.
From essential setup tips to advanced techniques, this guide has something for everyone. So, before you lose yourself in the captivating realms of VR, let’s ensure you’re fully equipped with the knowledge to master your Meta Quest 3 like a pro. And don’t forget, the world of VR accessories awaits, ready to further amplify your gaming comfort and enjoyment.
Things to do with your Meta Quest 3
- Measure IPD
- Check the comfort rating
- Set up your playspace
- Check the comfort rating
- Share the experience
- Capture the actions
- Get health tracking
- Setup additional profiles
- Lock Apps
- Enable voice command
Measure IPD
Prior to embarking on your virtual reality journey with the Meta Quest 3, there’s a crucial step you should never overlook: measuring your interpupillary distance (IPD) and setting the lens distance. It’s the cornerstone of ensuring a comfortable and headache-free VR experience. Incorrect IPD settings can quickly lead to discomfort and a less-than-optimal time in the virtual world. Fortunately, adjusting the IPD on your Quest 3 is a straightforward process.
To begin, grab a ruler with millimetre marks and follow these steps to measure your IPD accurately:
- While facing a mirror, close your left eye.
- Directly gaze into the mirror with your right eye.
- Hold the ruler just below your eye, ensuring the zero marker aligns with your right pupil.
- Without moving the ruler, close your right eye and open your left eye.
- Look into the left mirror with your left eye.
- Keep your gaze straight and note the millimetre measurement that corresponds to the centre of your left pupil.
The average adult’s IPD typically falls within the range of 60-68mm, but individual variations exist. Once you’ve determined your IPD, don your Meta Quest 3 headset and locate the IPD adjustment wheel on the headset’s underside, next to your nose. As you rotate this wheel, an IPD measurement dialog will appear on the screen.
Simply adjust the wheel until your IPD matches the measurement you obtained earlier. It’s a crucial step to ensure that both you and anyone sharing your headset can enjoy a tailored and comfortable VR experience. So, before you immerse yourself in the virtual world, take a moment to get your IPD settings just right!
Check the comfort rating
Checking the comfort rating is a fundamental step, whether you’re a seasoned VR enthusiast or just venturing into the virtual realm with your Meta Quest 3. Not everyone’s tolerance for virtual motion is the same, and understanding the comfort rating is key to a smooth VR experience, especially for newcomers. Ignoring this crucial factor and opting for a game with a moderate or intense rating can lead to discomfort, motion sickness, headaches, and an overall unpleasant time in the virtual world.
When you’re perusing the top Meta Quest games, take a moment to glance at the comfort rating, which is prominently displayed. Whether you’re browsing on your desktop or mobile device, the Quest Store provides clear descriptions and color-coded ratings to simplify your decision-making process.
A green “Comfortable” rating indicates that the game should be suitable for most players, as long as they select the appropriate comfort options within the game settings. Games with a yellow “Moderate” rating are generally fine for those who have some VR experience under their belts. However, titles marked with a red “Intense” rating are best reserved for individuals with strong stomachs or seasoned VR veterans who thrive on the most challenging virtual experiences. So, remember to heed the comfort rating to ensure a comfortable and enjoyable time in the VR universe.
Set up your playspace
Setting up your playspace is a pivotal step in ensuring an optimal and immersive VR experience with your Meta Quest 3. The beauty of VR lies in the freedom to move around your room, and this headset takes it a step further by allowing you to map your furniture and walls, opening the door to captivating mixed reality experiences.
When you power up your Quest 3, it will guide you through the process of automatically mapping your room and playspace. To make the most of this feature, ensure that your floor is clear of any obstructions like coffee tables or laundry baskets. This initial room mapping is essential for creating a seamless VR environment.
To further enhance your mixed reality experiences and enable quick transitions from seated to standing positions without remapping, you can add your furniture to VR. Here’s a simple guide to get it done:
- Put on your headset and press the Meta button on the right controller to access the universal menu.
- Click the clock icon on the left side of the menu to open Quick Settings.
- Select “Settings” in the top right corner, then tap on “Physical Space.”
- Choose “Space Setup” from the menu.
- Follow the on-screen prompts to add your couches, tables, walls, or any other objects in your room.
Additionally, ensure that your playspace is well-lit, as insufficient lighting can impact tracking performance or even disable tracking altogether. It’s worth noting that hand tracking functions best in well-illuminated environments.
If you prefer playing in dimmer settings, consider investing in an infrared illuminator, like Zyber, which connects to your headset’s USB-C port and creates a discreet canvas of light visible only to your headset, ensuring a smooth experience even in the shadows, without disturbing your housemates. So, with a well-organised playspace and adequate lighting, you’re all set to immerse yourself in the exciting world of VR with your Meta Quest 3.
Share the experience
Sharing the captivating VR experiences you enjoy on your Meta Quest 3 with those around you can be a delightful way to introduce others to the world of virtual reality. While VR is an incredibly immersive experience, it remains hidden from view for observers unless you choose to cast your adventure to a smartphone or TV.
If you’re already wearing your headset, casting is a breeze. Simply press the Meta Button on the right controller to access the Universal Home Menu. From there, tap the Camera icon and select “Cast.” A pop-up menu will display any compatible devices on your Wi-Fi network that you can cast to, making it easy to share your VR adventures with friends and family.
For a more seamless casting experience, especially when demonstrating the headset to others, consider using the Meta Quest app on your Android or iOS device. This app, which you likely used for the initial setup of your headset, is perfectly suited for everyday use and casting.
Here’s how to cast to your smartphone or tablet using the Meta Quest app:
- Open the Meta Quest app on your mobile device.
- On the app’s home screen, locate and tap the Cast button next to your Meta Quest 3 headset.
- Once your headset connects to your phone, tap Cast again to initiate the feed.
- While watching the VR feed on your mobile device’s display, tap anywhere to access the menu.
- From the menu, you can remotely launch apps and games for the person wearing the VR headset, simplifying the process and enhancing their VR experience.
By remotely launching apps and games, you can make the VR journey smoother and more enjoyable for those trying it for the first time. Remember to select appropriate VR games for newcomers, as not all experiences are suitable for beginners. Ensuring a comfortable and enjoyable introduction to VR will leave a lasting impression and spark curiosity in those who share your VR adventures. So, cast away and let the world of virtual reality unfold for everyone to see and enjoy.
Capture the actions
Unlocking the capability to capture and share your VR experiences is a fantastic way to bring others into your virtual world and relive your favourite moments. Fortunately, the Meta Quest 3 makes this process incredibly straightforward, allowing you to take screenshots, record videos, and even live stream your gameplay to your Facebook feed with ease.
To snap a screenshot that immortalises a remarkable VR moment, simply press and hold the Meta button while simultaneously holding down the trigger on the right controller for about one second. When executed correctly, you’ll be treated to the iconic sound of a screen capture.
For those instances when you wish to record a video and create lasting memories, press and hold the Meta button and the trigger on the right controller until you spot a recording dot in the top right corner of your headset’s display. When you’re ready to conclude your recording, repeat the same steps until the recording dot vanishes.
Alternatively, you can initiate recording by pressing the Meta button on the right controller and then tapping the camera icon on the universal home bar situated at the bottom of the screen. From this convenient menu, you can not only capture quick videos and screenshots but also commence a live stream to your Facebook feed. If your Meta Quest hasn’t been linked to your Facebook account previously, the headset will guide you through the setup process seamlessly.
When you’ve concluded your VR adventures and are eager to share your collected screenshots and videos, open the Meta Quest app on your smartphone and navigate to the Gallery tab at the bottom of the screen. Here, you’ll find all your recently captured moments, ready to be shared with friends and family.
In the rare event that your most recent media isn’t visible, you can manually synchronise it by putting on your Meta Quest 3, pressing the Meta button on the right controller, and tapping the camera icon on the universal home bar at the bottom.
Hover your hand or cursor over the media you want to sync, then tap the three dots located on the top right of the thumbnail and select “sync now.” This ensures that your media is promptly available in the Meta Quest app on your smartphone, allowing you to effortlessly curate and share your VR escapades. So, don’t miss out on capturing those unforgettable VR moments and sharing them with the world.
Get health tracking
Meta Quest Move is a valuable built-in health-tracking app that provides insights into your physical activity while immersed in the virtual worlds of VR. This versatile app doesn’t just track your calorie burn; it allows you to monitor your VR activities and sync this data seamlessly with your preferred Android or iOS health-tracking applications. Moreover, it offers detailed breakdowns of your gameplay duration for each game you delve into on a monthly basis.
To unlock the benefits of Meta Quest Move, begin by tapping the Meta button on your right controller. Next, locate the 9-dot grid icon situated on the bottom right to access your app drawer. Within this interface, you can either search for the Meta Quest Move app or locate it manually. Launch the app by tapping its icon and follow the straightforward setup process.
Once Meta Quest Move is configured, navigate to the settings within the app. Ensure that both “Track movement” and “Connect Move to Meta Quest App” options are enabled to maximise the utility of Meta Quest Move.
To complete the experience, establish a connection between Meta Quest Move and your Android phone by referring to the provided guide from Meta. Ensure that you have the free Google Health Connect app installed on your Android device before initiating the connection process. With Meta Quest Move, you can seamlessly integrate health tracking into your VR adventures, providing valuable insights into your physical activity and enhancing your overall virtual reality experience.
Setup additional profiles
Setting up additional profiles on your Meta Quest 3 is not only a breeze but also a crucial step to ensure that each member of your household can enjoy their personalised VR experience without any hassle. Sharing your headset with family members or friends is a natural part of the VR journey, and it’s essential to have distinct profiles for each user to cater to their unique preferences and progress.
What’s particularly remarkable is that the primary profile on the headset generously shares its library with all the other profiles on the same device. This means you won’t need to repurchase games or apps just because your spouse, children, or friends want to create their own profiles and have their own VR adventures.
To set up additional profiles, follow these straightforward steps:
- Begin by creating a new Meta account via the Meta accounts centre on the web.
- Put on your Meta Quest 3 headset and press the Meta button located on the right controller to bring up the universal menu.
- On the left side of the universal menu, tap the clock icon to access Quick Settings.
- From Quick Settings, select “Settings” in the top right corner, then tap “Accounts.”
- Now, click “Add Account” in the top right corner to initiate the process.
- Using your smartphone or tablet, navigate to www.meta.com/device and enter the 8-digit code displayed on your headset.
- Hand over the headset to the new user, who can then complete the setup of their personalised profile.
Once all the profiles are set up to your satisfaction, the next step is to enable app sharing between these profiles, ensuring that each user can access and enjoy the apps and games owned by the primary profile. Here’s how to enable app sharing:
- With your Meta Quest 3 headset on, press the Meta button on the right controller to open the universal menu.
- Access Quick Settings by tapping the clock icon on the left side of the universal menu.
- From Quick Settings, select “Settings” in the top right corner, then tap “Accounts.”
- Locate the toggle switch for “App Sharing” and click it to enable this feature.
Now, every sub-profile you create on your Meta Quest 3 can effortlessly launch any app or game that belongs to the primary profile, providing a hassle-free and personalised VR experience for everyone in your household. Sharing the magic of VR has never been this convenient and enjoyable!
Lock Apps
Ensuring that your Meta Quest 3 provides a safe and age-appropriate VR experience for all users, especially when sharing it with family members or friends, is of utmost importance. Fortunately, the headset offers a feature that allows you to make certain apps private by locking them behind a secure password. This can be particularly useful if you have apps or games with content that may not be suitable for everyone.
To set up app locks and protect specific apps with a PIN or password, follow these simple steps:
- Start by putting on your Meta Quest 3 headset, and then press the Meta button located on the right controller. This action will bring up the universal menu.
- On the left side of the universal menu, you’ll find the clock icon. Tap this icon to access Quick Settings.
- In Quick Settings, select “Settings” located in the top right corner, and then tap “Apps.”
- From the Apps menu, choose “App Locks.”
- Now, you can select any apps from the list that you want to lock. Follow the on-screen prompts to set up a secure PIN or password for each app you wish to make private.
By taking advantage of the app lock feature, you can ensure that certain apps or games remain accessible only to those with the correct PIN or password. This extra layer of security allows you to control and customise the VR experience on your Meta Quest 3, making it suitable for users of all ages and preferences. Your headset becomes a versatile tool for entertainment, education, and exploration, tailored to your specific needs.
Enable voice command
Enabling voice commands on your Meta Quest 3 headset is a fantastic way to streamline your VR experience and interact with your device effortlessly. Meta has continuously enhanced the Quest user interface to ensure a user-friendly environment, and voice commands offer an intuitive way to navigate and control your headset’s functions.
To get started with voice commands, follow these straightforward steps:
- Begin by wearing your Meta Quest 3 headset, and then press the Meta button on your right controller. This action will bring up the universal menu.
- Locate the clock icon on the left side of the universal menu and tap it to access Quick Settings.
- In Quick Settings, you’ll find the option “Voice Commands.” Tap on it.
- Now, select “Start Setup” to initiate the setup process.
- With voice commands enabled, you can use the trigger phrase “Hey Meta,” followed by your specific voice command.
- If you prefer a button shortcut to activate the assistant, navigate back to the Voice Commands section in settings and select “Enable Shortcut.”
- Once the shortcut is enabled, you can simply double-press the Meta button to initiate a voice command.
The possibilities with Meta Quest voice commands are extensive, providing you with a wide range of capabilities. You can control volume levels, check battery status, launch applications like Beat Saber, navigate back to the home screen, start or stop casting and recording, check who’s online, and even initiate a party chat. This hands-free approach enhances the overall convenience and accessibility of your Meta Quest 3, allowing you to enjoy your VR adventures to the fullest.
Tryout Hand tracking
Exploring hand tracking capabilities on your Meta Quest 3 can significantly enhance your virtual reality experience, especially for casual activities like socialising with friends, watching content, or performing quick tasks. Hand tracking provides a seamless and intuitive way to interact with the VR world, allowing you to navigate without the need for controllers.
What’s even more impressive is that hand tracking can improve the overall tracking of your controllers by simultaneously tracking your hands and controllers. Enabling hand tracking is a straightforward process:
- Start by putting on your Meta Quest 3 headset, then press the Meta button on the right controller to access the universal menu.
- Locate the clock icon on the left side of the universal menu to access Quick Settings.
- In Quick Settings, tap on “Settings” in the top right corner, and then select “Device” from the menu.
- Under “Device,” choose “Hands and Controllers.”
- Click the toggle next to “Hand Tracking” to activate this feature.
Once hand tracking is enabled, you can seamlessly engage in activities, play hand-tracking games, and effortlessly navigate the Quest UI without requiring controllers. If you initially start with controllers but wish to switch to hand tracking, simply double-tap your controllers together to toggle between the two modes.
Returning to controller usage is equally simple; just pick up your controllers and press any button to wake them up. This flexibility offers you the best of both worlds, catering to your preferences and needs while using your Meta Quest 3 headset.
Toggle Passthrough
The Meta Quest 3 offers a remarkable feature that allows you to seamlessly transition between virtual reality and mixed reality “passthrough” vision with a simple double-tap of your headset. This feature provides you with the flexibility to check your real-world surroundings while immersed in the virtual realm, enhancing both safety and convenience.
To ensure that the double-tap gesture for passthrough vision is enabled and functioning correctly, follow these steps:
- Begin by putting on your Meta Quest 3 headset, then use the right controller to press the Meta button, bringing up the universal menu.
- Locate the clock icon on the left side of the universal menu to access Quick Settings.
- Within Quick Settings, tap on “Settings” located in the top right corner. From there, select “Guardian” from the menu on the left-hand side.
- You’ll see an option labelled “Double Tap for Passthrough.” Click the toggle next to this option to enable it.
With this feature activated, you can effortlessly toggle between the immersive virtual world of your Meta Quest 3 and a clear view of your actual surroundings whenever needed. Whether you’re on the Quest home screen or deeply engaged in a gaming session, the ability to switch between these perspectives adds an extra layer of versatility to your VR experience.
Swipe Typing
Meta Quest 3’s Direct Touch UI, introduced in 2023, continues to evolve with new features, enhancing the usability of the virtual interface. Among these features, swipe typing has become a fantastic addition, making text input in VR more efficient and reminiscent of using a smartphone or tablet keyboard. If you’re looking to speed up your virtual conversations, swipe typing is the way to go. Here’s how to enable it:
- Begin by wearing your Meta Quest 3 headset, then use the right controller to press the Meta button, bringing up the universal menu.
- On the left side of the universal menu, you’ll find the clock icon, which opens Quick Settings. Click on it to proceed.
- Within Quick Settings, locate and tap “Settings” in the top right corner. From there, select “Experimental Features.”
- You’ll find an option labelled “Swipe Typing.” Click the toggle next to this option to activate the feature.
With swipe typing enabled, you can effortlessly glide your finger across the virtual keyboard, just like you would on a smartphone, making text input in VR faster and more intuitive. This feature is particularly useful for everyday conversations and tasks within the Meta Quest 3 interface.
Personalise your home environment
Your Meta Quest 3 offers a customizable home environment that allows you to personalise your virtual space to your liking. While the default home environment provides a passthrough view of your real-world surroundings, you have the option to switch to a more immersive virtual environment whenever you desire. Here’s how you can do it:
- Start by wearing your Meta Quest 3 headset, and then use the right controller to press the Meta button, bringing up the universal menu.
- On the left side of the universal menu, you’ll find the clock icon, which opens Quick Settings. Click on it to proceed.
- Within Quick Settings, look for the “Space” tile on the screen. Tapping this tile allows you to toggle between Passthrough (real room view) and Immersive (virtual environment) modes.
But why settle for the default immersive environment when you can choose from a variety of free environments offered by Meta or even use your own 360-degree image to create a truly unique virtual home? Here’s how to set up a new home environment:
- Begin by wearing your headset and pressing the Meta button on the right controller to access the universal menu.
- Once again, click on the clock icon located on the left side of the universal menu to access Quick Settings.
- Within Quick Settings, select “Settings” in the top right corner, and then choose “Personalization.”
- From the list of available home environments, pick the one that suits your preferences. If necessary, you may need to download it before applying.
With this customization feature, you can transform your Meta Quest 3’s home environment into a space that reflects your unique style and preferences, making your VR experience even more personalised and enjoyable.
Get smoother performance
If you’re looking to enhance the performance of your Meta Quest 3 for a smoother and more immersive VR experience, consider taking advantage of the higher refresh rate option. Both the Meta Quest 2 and Quest 3 support different refresh rates, but the Quest 3, equipped with its more robust chipset, makes running apps and games at 120Hz a viable and appealing choice. This higher refresh rate significantly improves the overall smoothness of your VR experiences and can be particularly beneficial for individuals who are sensitive to motion.
However, it’s important to note that enabling 120Hz may lead to faster battery drain on your Quest. If you notice a significant reduction in battery life, you can easily revert to the standard refresh rate to conserve power.
To enable the 120Hz refresh rate and enjoy smoother VR performance, follow these steps:
- Begin by wearing your headset and pressing the Meta button on the right controller, which will bring up the universal menu.
- Locate the clock icon on the left side of the universal menu and click on it to access Quick Settings.
- In the Quick Settings menu, select “Settings” in the top right corner, and then choose “System.”
- Within the System menu, tap on “Display.”
- You’ll find a switch next to “120Hz Refresh Rate.” Simply click this switch to enable the feature.
By enabling the 120Hz refresh rate, you can optimise your Meta Quest 3’s performance for a smoother and more enjoyable VR experience, all while benefiting from the enhanced capabilities of this powerful VR headset.
Better Battery Life
For gamers planning extended VR sessions on their Meta Quest 3, the introduction of the battery-saver mode is a game-changer when it comes to prolonging your headset’s battery life. This new feature allows you to make the most out of your VR experience without worrying about running out of power too soon.
Battery-saver mode operates by optimising your VR game or app settings. It achieves this by reducing the frame rate and resolution, which not only conserves battery but also ensures a smoother performance. Additionally, this mode dims your headset’s brightness and may even disable Wi-Fi when not in use, further enhancing battery efficiency.
To enable this power-saving mode and extend your Meta Quest 3’s battery life, follow these simple steps:
- Begin by wearing your headset and pressing the Meta button on the right controller to access the universal menu.
- Locate the clock icon positioned on the left side of the universal menu, and click on it to open Quick Settings.
- In the Quick Settings menu, tap “Settings” found in the top right corner, and then select “System.”
- Inside the System menu, tap on “Power.”
- You’ll find a switch adjacent to “Extended Battery Mode.” Simply click this switch to activate the feature.
By enabling the extended battery mode, you can enjoy extended VR sessions on your Meta Quest 3 while making the most of its battery life-saving capabilities. This is especially handy for those immersive gaming experiences that require a longer playtime without the need for frequent recharging.
Conclusion
In conclusion, “Mastering Your Meta Quest 3: Top Tips and Tricks for Ultimate VR Experiences” provides an insightful guide that elevates the Meta Quest 3 review experience, offering valuable insights and expert tips to optimize your virtual reality adventures. This comprehensive resource ensures users can unlock the full potential of their Meta Quest 3, enhancing their overall immersion and enjoyment in the world of virtual reality.